
English
Views: 0 Author: Site Editor Publish Time: 2026-07-16 Origin: Site


Engine teardowns to diagnose carbon buildup are no longer economically viable for modern automotive repair shops or fleet maintenance teams. Blindly applying chemical treatments without visual verification often leads to incomplete repairs or wasted resources. Direct-injection engines accumulate stubborn carbon deposits rapidly. These deposits restrict critical airflow and cause severe misfires. Mechanics need a reliable way to assess cylinder health. Relying on sheer guesswork compromises repair quality and damages client trust.
Using a professional-grade Industrial Endoscope allows technicians to perform non-destructive, highly accurate visual inspections of piston crowns, cylinder walls, and intake valves. This guide breaks down the standard operating procedure for engine carbon inspection. You will learn how to interpret visual data effectively. We also outline the criteria required to evaluate equipment for your facility.
Non-Destructive Diagnosis: Visual inspection via spark plug ports eliminates the need for expensive, labor-intensive cylinder head removal.
Critical Equipment Specs: Effective carbon diagnosis requires a probe diameter under 6mm, 180-degree articulation (to view valves), and glare-reducing illumination.
Data-Driven Maintenance: High-resolution visual evidence allows shops to justify intake cleaning services to customers using verifiable proof.
Supplier Evaluation: Sourcing from a specialized industrial endoscope supplier ensures access to fluid-resistant (IP67+), heat-tolerant probes with reliable after-sales support.
Modern automotive diagnostics demand immense efficiency. Tearing down an engine block to inspect valves consumes hours of valuable bay time. This invasive approach frustrates technicians and delays vehicle returns. Non-destructive inspection changes this dynamic completely. You bypass heavy mechanical labor entirely.
Labor Efficiency: A standard visual check reduces diagnostic time drastically. You transition from a multi-hour teardown to under 15 minutes per vehicle. Technicians simply remove the spark plugs. They insert the probe directly into the cylinder.
Customer Transparency (Voice of Customer): Vehicle owners naturally distrust vague diagnostic reports. Providing high-definition images or videos of carbon buildup directly to vehicle owners builds immediate trust. Visual evidence justifies necessary repair costs. Customers see exactly what you see on the screen.
Preventative Accuracy: Internal combustion engines constantly produce normal combustion byproducts. However, performance-robbing hard carbon requires a different maintenance approach. Visual tools identify the difference before hard carbon causes valve seating failures. They also spot conditions leading to early misfires.
Service ROI: Investing in specialized diagnostic equipment pays dividends rapidly. The tool typically pays for itself after diagnosing and selling just a few targeted services. Mechanics can easily recommend walnut blasting or induction cleaning services based on clear evidence.
You optimize workshop throughput effortlessly. Diagnostics transform into a verifiable, documented procedure. Technicians stop replacing parts blindly. They pinpoint exact carbon accumulation zones. This targeted approach prevents unnecessary part replacements. It elevates the overall service standard of your automotive business.
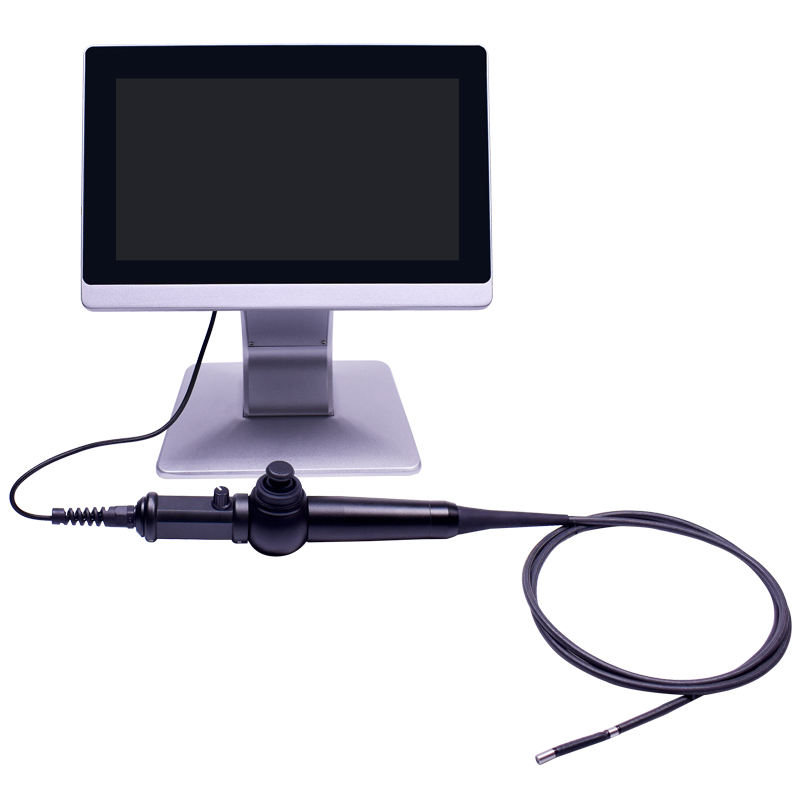
Not all inspection cameras meet the harsh demands of an engine bay. You must evaluate specific hardware capabilities strictly. Consumer-grade USB cameras fail quickly under frequent commercial use. Professional diagnostics require specialized optical and mechanical traits to ensure accuracy.
Probe Diameter and Flexibility: The camera head must be small enough to navigate tight spaces. Look for probe diameters between 4mm and 6mm. This size easily clears spark plug or injector ports without binding. A thick probe risks getting stuck inside the cylinder head.
Multi-Directional Articulation: You cannot thoroughly inspect modern engines using a rigid, fixed lens. Two-way or four-way articulation is non-negotiable. The camera must bend up to 180 degrees backwards. You need this articulation to inspect the backside of intake valves. Carbon heavily accumulates here in direct-injection engines.
Macro Focal Length & Glare Reduction: Cylinder walls and oily piston tops reflect intense light. The equipment must feature adjustable LED intensity. A short macro focal length (e.g., 10mm–30mm) is absolutely mandatory. It captures incredibly sharp images in confined, highly reflective spaces.
Thermal & Chemical Durability: Engine bays contain highly aggressive solvents. Probes must carry an IP67 rating or higher. This rating ensures they withstand direct exposure to unburned fuel, engine oil, and carbon solvents. Cheap seals dissolve rapidly, ruining the delicate internal camera electronics.
Mechanics must rely on ruggedized tools. Using inadequate hardware leads to poor image quality. It also forces premature equipment replacement. Compare essential specifications carefully before making a purchasing decision.
Hardware Specification | Minimum Requirement | Automotive Benefit |
|---|---|---|
Probe Diameter | 4mm – 6mm | Easily passes through narrow spark plug ports safely. |
Articulation Angle | 180 degrees (2-way or 4-way) | Allows direct viewing of the intake valve stems. |
Focal Length | Macro focus (10mm – 30mm) | Keeps close-up cylinder wall textures perfectly sharp. |
Ingress Protection | IP67 rating minimum | Resists motor oil, fuel drops, and harsh chemical cleaners. |
Follow a strict operational procedure to protect the delicate diagnostic equipment. Precision execution guarantees accurate diagnostic results. We outline the standard professional workflow below to ensure safe handling.
You must prepare the vehicle correctly before ever unspooling the probe. Rushing this initial stage often damages the camera lens permanently.
Cool Down: Never insert a standard probe into an engine at full operating temperature. High heat melts the camera lens housing instantly. Always allow the engine block to cool sufficiently.
Access: Safely disconnect the battery to prevent accidental sparking. Remove the ignition coils carefully. Extract the spark plugs to open up the main inspection ports.
Piston Positioning: You need adequate visual clearance within the cylinder. Manually rotate the crankshaft. Bring the target piston down to Bottom Dead Center (BDC). This specific position maximizes the focal range for the camera inside the cylinder.
Handling the delicate articulation cables requires a gentle, deliberate touch. Forcing the cable leads to broken tension wires.
Straight Entry: Insert the probe carefully into the opening. Avoid scraping the delicate optical lens against the rough spark plug port threads. Keep the cable perfectly centered during entry.
Piston Crown Inspection: Slowly pan the camera across the piston top. Look for thick, uneven crusts of hard carbon. Spot damp oil pooling in the metal recesses. Identify clean patches on the outer edges. Clean edges often indicate piston ring wash from fuel flooding.
Valve Inspection: Push the probe slightly deeper into the chamber. Articulate the tip 180 degrees upwards toward the cylinder head. Inspect the intake and exhaust valves closely. Look for heavy carbon caking on the valve stems and mating seats.
Visual data drives transparent customer communication and historical tracking.
Capture high-resolution still images continuously. Record short video sweeps of each individual cylinder.
Label files systematically in the device menu. Use clear names (e.g., Cylinder 1, 2, 3) for accurate customer reporting.
Retain these exact files for baseline comparison post-cleaning. Customers appreciate seeing the undeniable "before and after" results.
Capturing the image is only the first critical step. You must analyze the visual evidence correctly. Technicians must easily differentiate between normal wear and critical mechanical failures. Using a high-definition Industrial Endoscope makes this analysis highly precise.
Dry vs. Wet Carbon: Engine aging naturally produces dry, flaky buildup over thousands of miles. This condition is manageable and highly common. Conversely, wet, sludgy carbon raises immediate red flags. Wet carbon often indicates leaking valve stem seals. It can also point to PCV system failures or failing piston rings. Wet oil constantly entering the chamber prevents proper combustion.
Valve Seating Interference: You must focus intently on the valve mating surfaces. Look for hardened, crystallized carbon chunks. These chunks physically prevent the valve from closing fully. An open valve causes severe compression loss. This condition requires immediate mechanical cleaning, such as walnut blasting. Standard chemical additives simply will not dissolve these hard, baked-on chunks.
Wall Scoring: Shift your visual focus to the cylinder walls. Utilize side-view cameras or articulation maneuvers to check for vertical scoring marks. Deep scratches change the diagnostic scope entirely. Scoring indicates mechanical damage far beyond simple carbon buildup. If you observe deep gouges, you may need to quote a full engine rebuild rather than a simple cleaning.
Your hardware is ultimately only as good as the company backing it. Procuring reliable equipment requires careful vendor evaluation. Finding a specialized Industrial Endoscope supplier guarantees long-term operational success for your mechanics.
Hardware Ecosystem: Look for suppliers offering fully interchangeable probes. Automotive diagnostics vary daily. A busy shop may need a 6mm articulating probe for engines. They might also need a rigid probe for heavy chassis inspections. Interchangeability maximizes workshop utility and prevents purchasing redundant base units.
Warranty and Repair Programs: Articulating cables naturally endure constant mechanical stress. Wear and tear are inevitable in auto repair. A reputable industrial endoscope supplier will offer transparent repair costs. They provide solid warranties covering broken articulation wires. You avoid discarding an entire expensive unit over one broken steering cable.
Software and Compliance: Diagnostic reporting should remain absolutely frictionless. Ensure the operating system allows for easy Wi-Fi or USB export of reports. Avoid proprietary, subscription-based software walls. Repair shops must own their diagnostic data without paying monthly fees just to view their own videos.
B2B Support vs. Cheap Alternatives: Consumer-grade USB cameras flood the online market constantly. They completely lack the heat resistance needed for engine bays. They also fail to provide professional image clarity. Partner with vendors strictly focused on industrial and commercial mechanics. Dedicated suppliers understand professional workshop demands. They offer robust products designed specifically for heavy daily usage.
Deploying an industrial endoscope for engine carbon deposit inspection shifts automotive diagnostics from guesswork to evidence-based mechanical evaluation. By understanding the required specifications—such as articulation and macro-focus—and following a strict operational procedure, technicians can significantly improve diagnostic accuracy. For repair businesses and fleet operators, standardizing this process begins with selecting a qualified supplier capable of providing durable, high-resolution diagnostic tools suited for harsh automotive environments.
Actionable next steps to improve your diagnostic workflow:
Audit your current diagnostic processes to eliminate unnecessary teardowns.
Implement a strict engine cooldown protocol before inserting optical probes.
Partner with a dedicated supplier offering IP67-rated articulating cameras.
Integrate captured visual evidence directly into your customer repair estimates.
A: Most standard industrial probes are rated for temperatures up to 60°C–80°C (140°F–176°F). You must allow the engine to cool before inspection. High-temperature specialty probes exist but are generally cost-prohibitive for standard auto repair.
A: While a side-view (dual-lens) camera shows the cylinder walls, it cannot look directly upward at the valve stems. Articulation is required to physically bend the camera to inspect the intake valves where direct-injection engines suffer the most carbon buildup.
A: Use a lint-free swab lightly dampened with isopropyl alcohol. Gently wipe the glass lens and the surrounding LEDs. Avoid using harsh brake cleaners, which can degrade the adhesive sealing the camera housing.


